

This is where you edit the text content of your Item and it includes some tools to help you format your content.
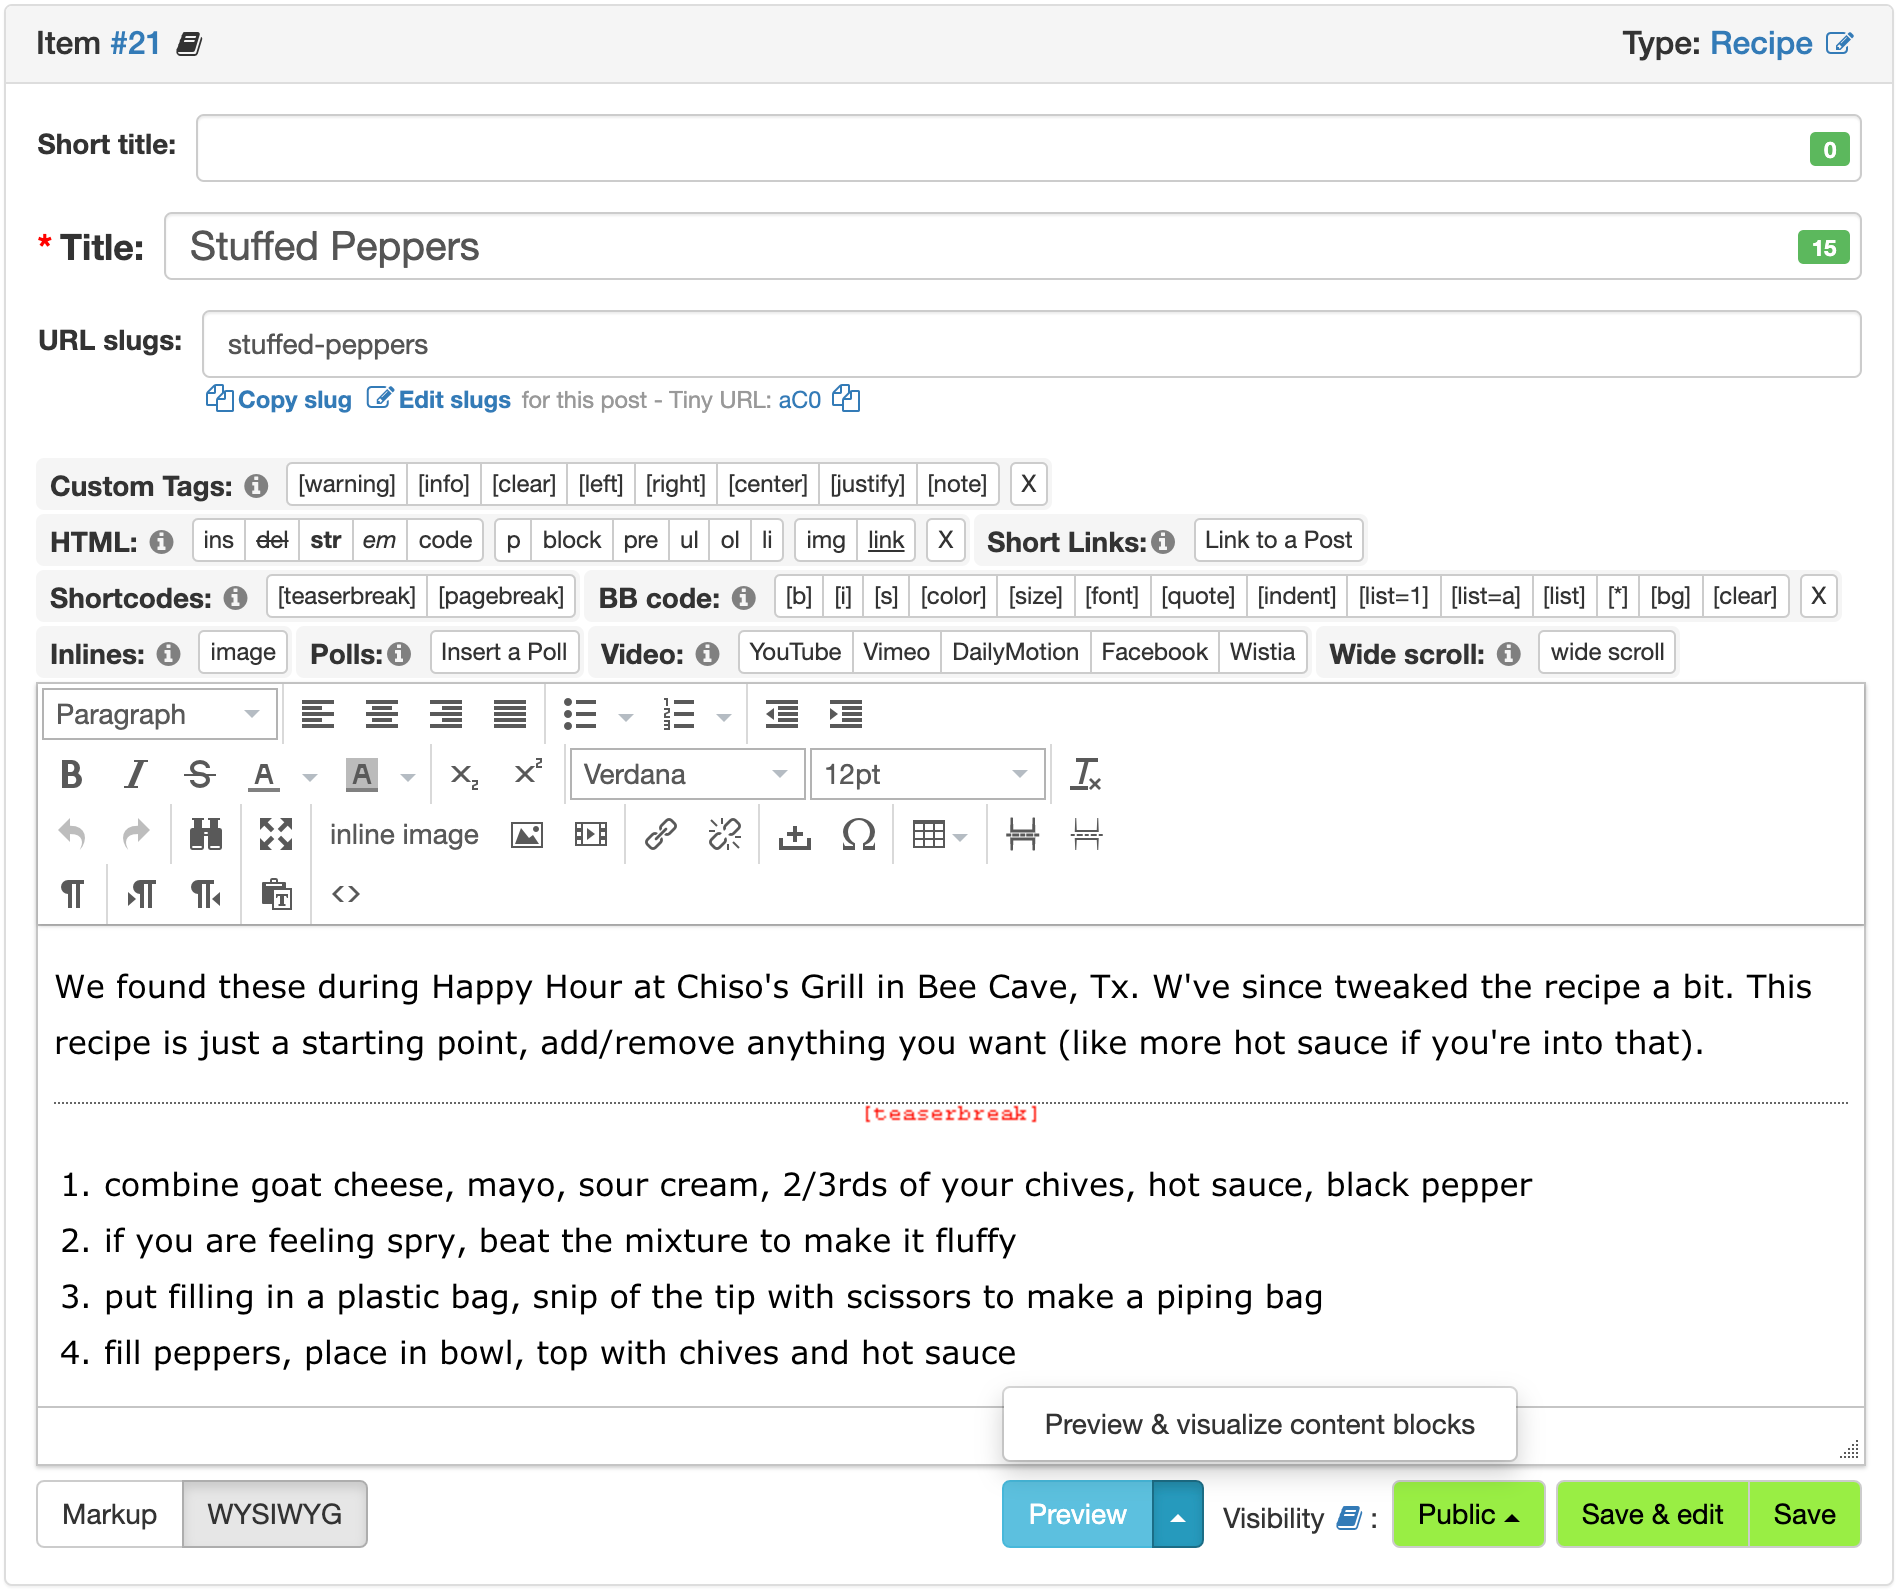
Title Bar
Notice the Item ID and the Item Type. Click on the item type to change it. You can edit the properties of the current item type by clicking on the edit icon ![]() beside it.
beside it.
Short title
This is short title of your Item. May be useful if navigation widgets like Content Hierarchy Widget.
Title
This is the headline of your Item. Depending on the Item Type feature, a short title field may also be shown. A string length counter is displayed on the right side to help you manage the Item’s title.
URL slugs
when you use clean URLs, this is the part at the end of the URL that uniquely identifies an Item. For more information, please visit Editing Slugs On An Item.
Language (v6)
This lets you select the Locale of your post from all of the locales that have been enabled in the Regional Settings Screen. For this drop down box to appear, you must have more than one locale selected. To select additional locales, navigate to System > Regional > Locales; this is the first tab under the new screen. Check the box next to each locale that you want to appear.
In v7, this option is found in a separate panel. Please see Item Languages / Version Panel for more details.
Toolbars
Toolbars help you in editing your post in the main text area. They can automatically add code/tags to the main text area. The included toolbars are installed from plugins and you can enable or disable these toolbars on a per collection basis by navigating to Collection > [Collection name] > Settings > Plugins.
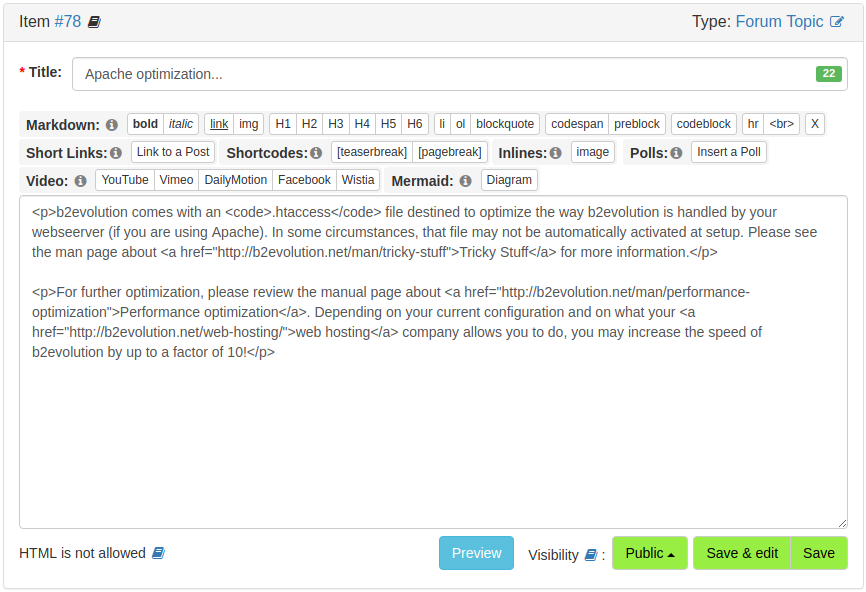
Markup vs. WYSIWYG
Depending on a Item Type feature setting, you can switch between Markup and WYSIWYG modes using this toggle buttons. To enable this feature, ensure that the Allow HTML is checked in the Item Type Features.
By default, some item types do not allow HTML - forum topics and manual pages for example. The edit screen for these item types should look similar to this:
Main Text Area
This is where you enter the text content for your item.
- If the Item Type allows it, you can enter XHTML tags here, however, some tags might get rejected later depending on your SafeXhtmlChecker and other security settings.
- You can also use alternative markup based on what renderer plugins you have enabled.
- Finally, there are a few special markers or short tags that you can use. These will be interpreted by b2evolution when displaying the post. You can read more about short tags in the Short Tags Reference. Additional short tags are provided by Renderer Plugins.
Action Buttons
- Preview: this button will open a new window (or tab) and show you a preview of your post in your collection’s skin.
- Preview & visualize content blocks: this button does same action as "Preview" button with additional highlighting of included content blocks in orange wrapper:

- Visibility: not exactly a button but this drop-down enables you to set the visibility status of the item.
- Save & edit: this will save the item and stay on the same edit screen. You can manually change the visibility status with the Visibility selector.
- Save: this will Save the item without changing its status. You can manually change the visibility status with the Visibility selector.
- Publish!: this will save the item and make it public (Public status).
Configuring this panel
This panel may have more or less available fields depending on the configuration of the Item Type of the current edited Item.