Locales Tab
Locales define not only the language of the interface but also the formatting of dates/times as well as the first day of the week (used when displaying the calendar).
Each collection and each user can have their own locale. You can get additional language packs here. You can also create your own.
Using the Locales tab, you can set the default locale for your collection posts. You can edit locales, enable / disable them and create your own locale too.
Regional Settings
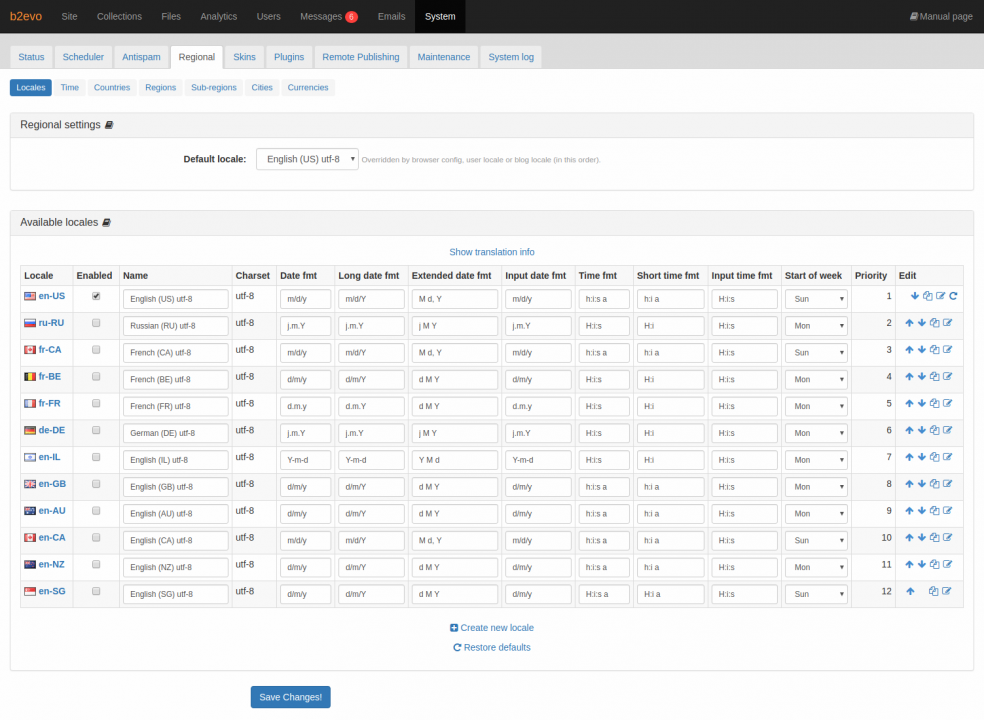
In the Regional Settings section, you can choose the default locale for your collection posts, using the drop down list available.

The default locale is used for displaying the login screen when there is no locale provided by the browser or for displaying the back-office as long as a user has not selected a different locale. Collections are always displayed with the locale configured for that collection.
Available Locales
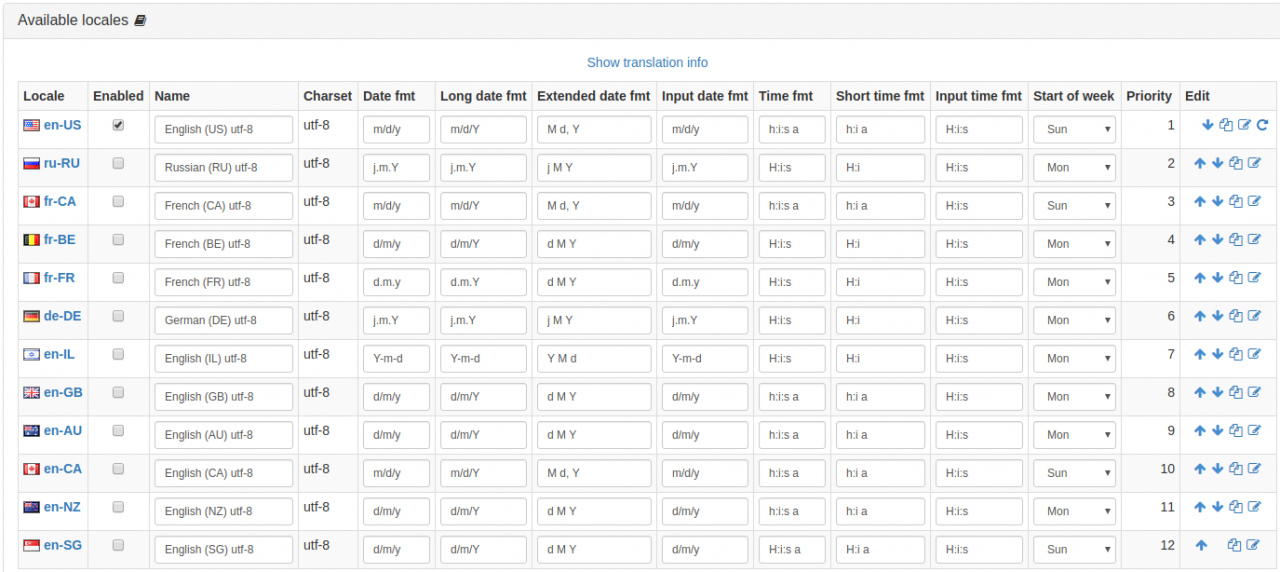
This table lists all the available locales and allows you to create your own locales. You can also enable various locales of your choice, edit the name, date & time format and prioritize your locales. To save any changes you make to this table, you need to click on the Save button below the table. The Reset button will reset all the fields to the original values when the page was loaded.

Show Translation Info
Click on the Show translation info link to display the number of strings that require translation and the percentage of those strings that are already translated for each locale.

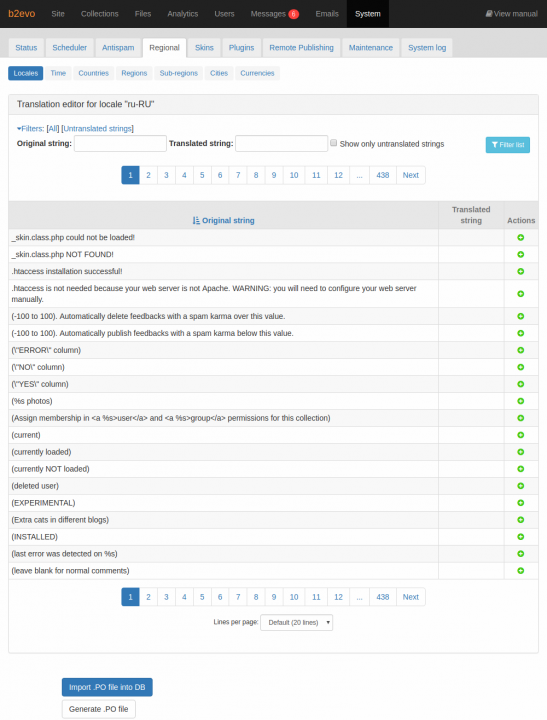
Clicking on the links under the "Translated" column will lead you a screen/list of strings for translation to the appropriate locale.

Buttons to (re)generate and (re)import POT (Portable Object Template) files are also displayed. You generate the POT file to extract the strings that the application use and need to be translated. The POT file contains entries of strings and their translation. Below is a sample POT entry:
#: ../../../default.php:108
msgid "Welcome to b2evolution"
msgstr ""
The first line is a comment that contains the filename and the line number where the string is found. The msgid is the original string to be translated and the mgstr contain the translated string.
To allow the extraction of language files, please set $allow_po_extraction = 1; in the conf/_locales.php configuration file. This will display a column that contains an [Extract] link for each locale.
For more details on localization, please read this page: Localizing / Translating b2evolution
Creating Locales
Please refer to this section for details on creating a new locale.
Enabling Locales
You can enable one or more locales by ticking the checkbox in the ‘Enabled’ column of the appropriate locale.
Locale Names
You can edit the display name of the locale by typing a name of your choice in the ‘Name’ column.
Locale Date & Time format
For each locale, you can edit the date format and month format columns and provide values of your choice.
You can also choose the start day of the week in the ‘Start of Week’ column.
Sample date formats:
d/m/y,m/d/y,d.m.y
Sample time formats:h:i:s,h:i:s a
More details on format strings can be found here.
Locale Priorities
Priority 1 is highest. Priority is important when selecting a locale from a language code and several locales match the same language. This can happen when detecting browser language. Priority also affects the order in which locales are displayed in dropdown boxes. To change the priority of a locale, you have to ‘Edit’ the locale. Please refer to the ‘Editing a locale’ section for details on how to edit a locale.
Locale Edit Options
Modifying the display order of your locales
The Up & Down arrows in the ‘Edit’ column can be used to re-order the position of locales within the table. The order of the enabled locales in this table will also be the order of the locales presented in the drop down list in the Regional Settings section too, when choosing your default locale.
Copying a Locale to a new locale
Clicking the ‘copy’ icon in the ‘Edit’ column will take you to the ‘create new locale’ page and pre-fill the fields of the create page with the details of the locale you copied. You can then edit the various fields and click on ‘Create’ to create your own locale.
Editing a locale
Clicking the ‘edit’ icon in the ‘Edit’ column will display the details of the locale. You can then edit the various fields and click on ‘Create’ to save your changes to the locale.
For example, if you want to edit the Priority, you can change the value of the priority field in the edit screen and click on ‘Create’.
Restoring Defaults
Clicking the ‘Restore default settings’ icon in the ‘Edit’ column will delete all your historical changes to the locale and will restore the default settings for the locale.
Clicking the ‘Restore Defaults’ link below the Available Locales table will restore the default settings for all the locales displayed in the table.


