

This page touches on 2 different topics:
- How to upload an image/video or other file to the server
- How to use this file in a post, once it has been uploaded to the server
Note: if you actually don’t want to upload the image to your server and insert an image from a different web URL, see: How to Include External Photos or Images.
1. Uploading Images, Videos or other Files
In most cases, if the photo, image, video or other file you want to publish is not already on your web server you will need to upload it first.
In order to upload new images to your server you can do one of the following:
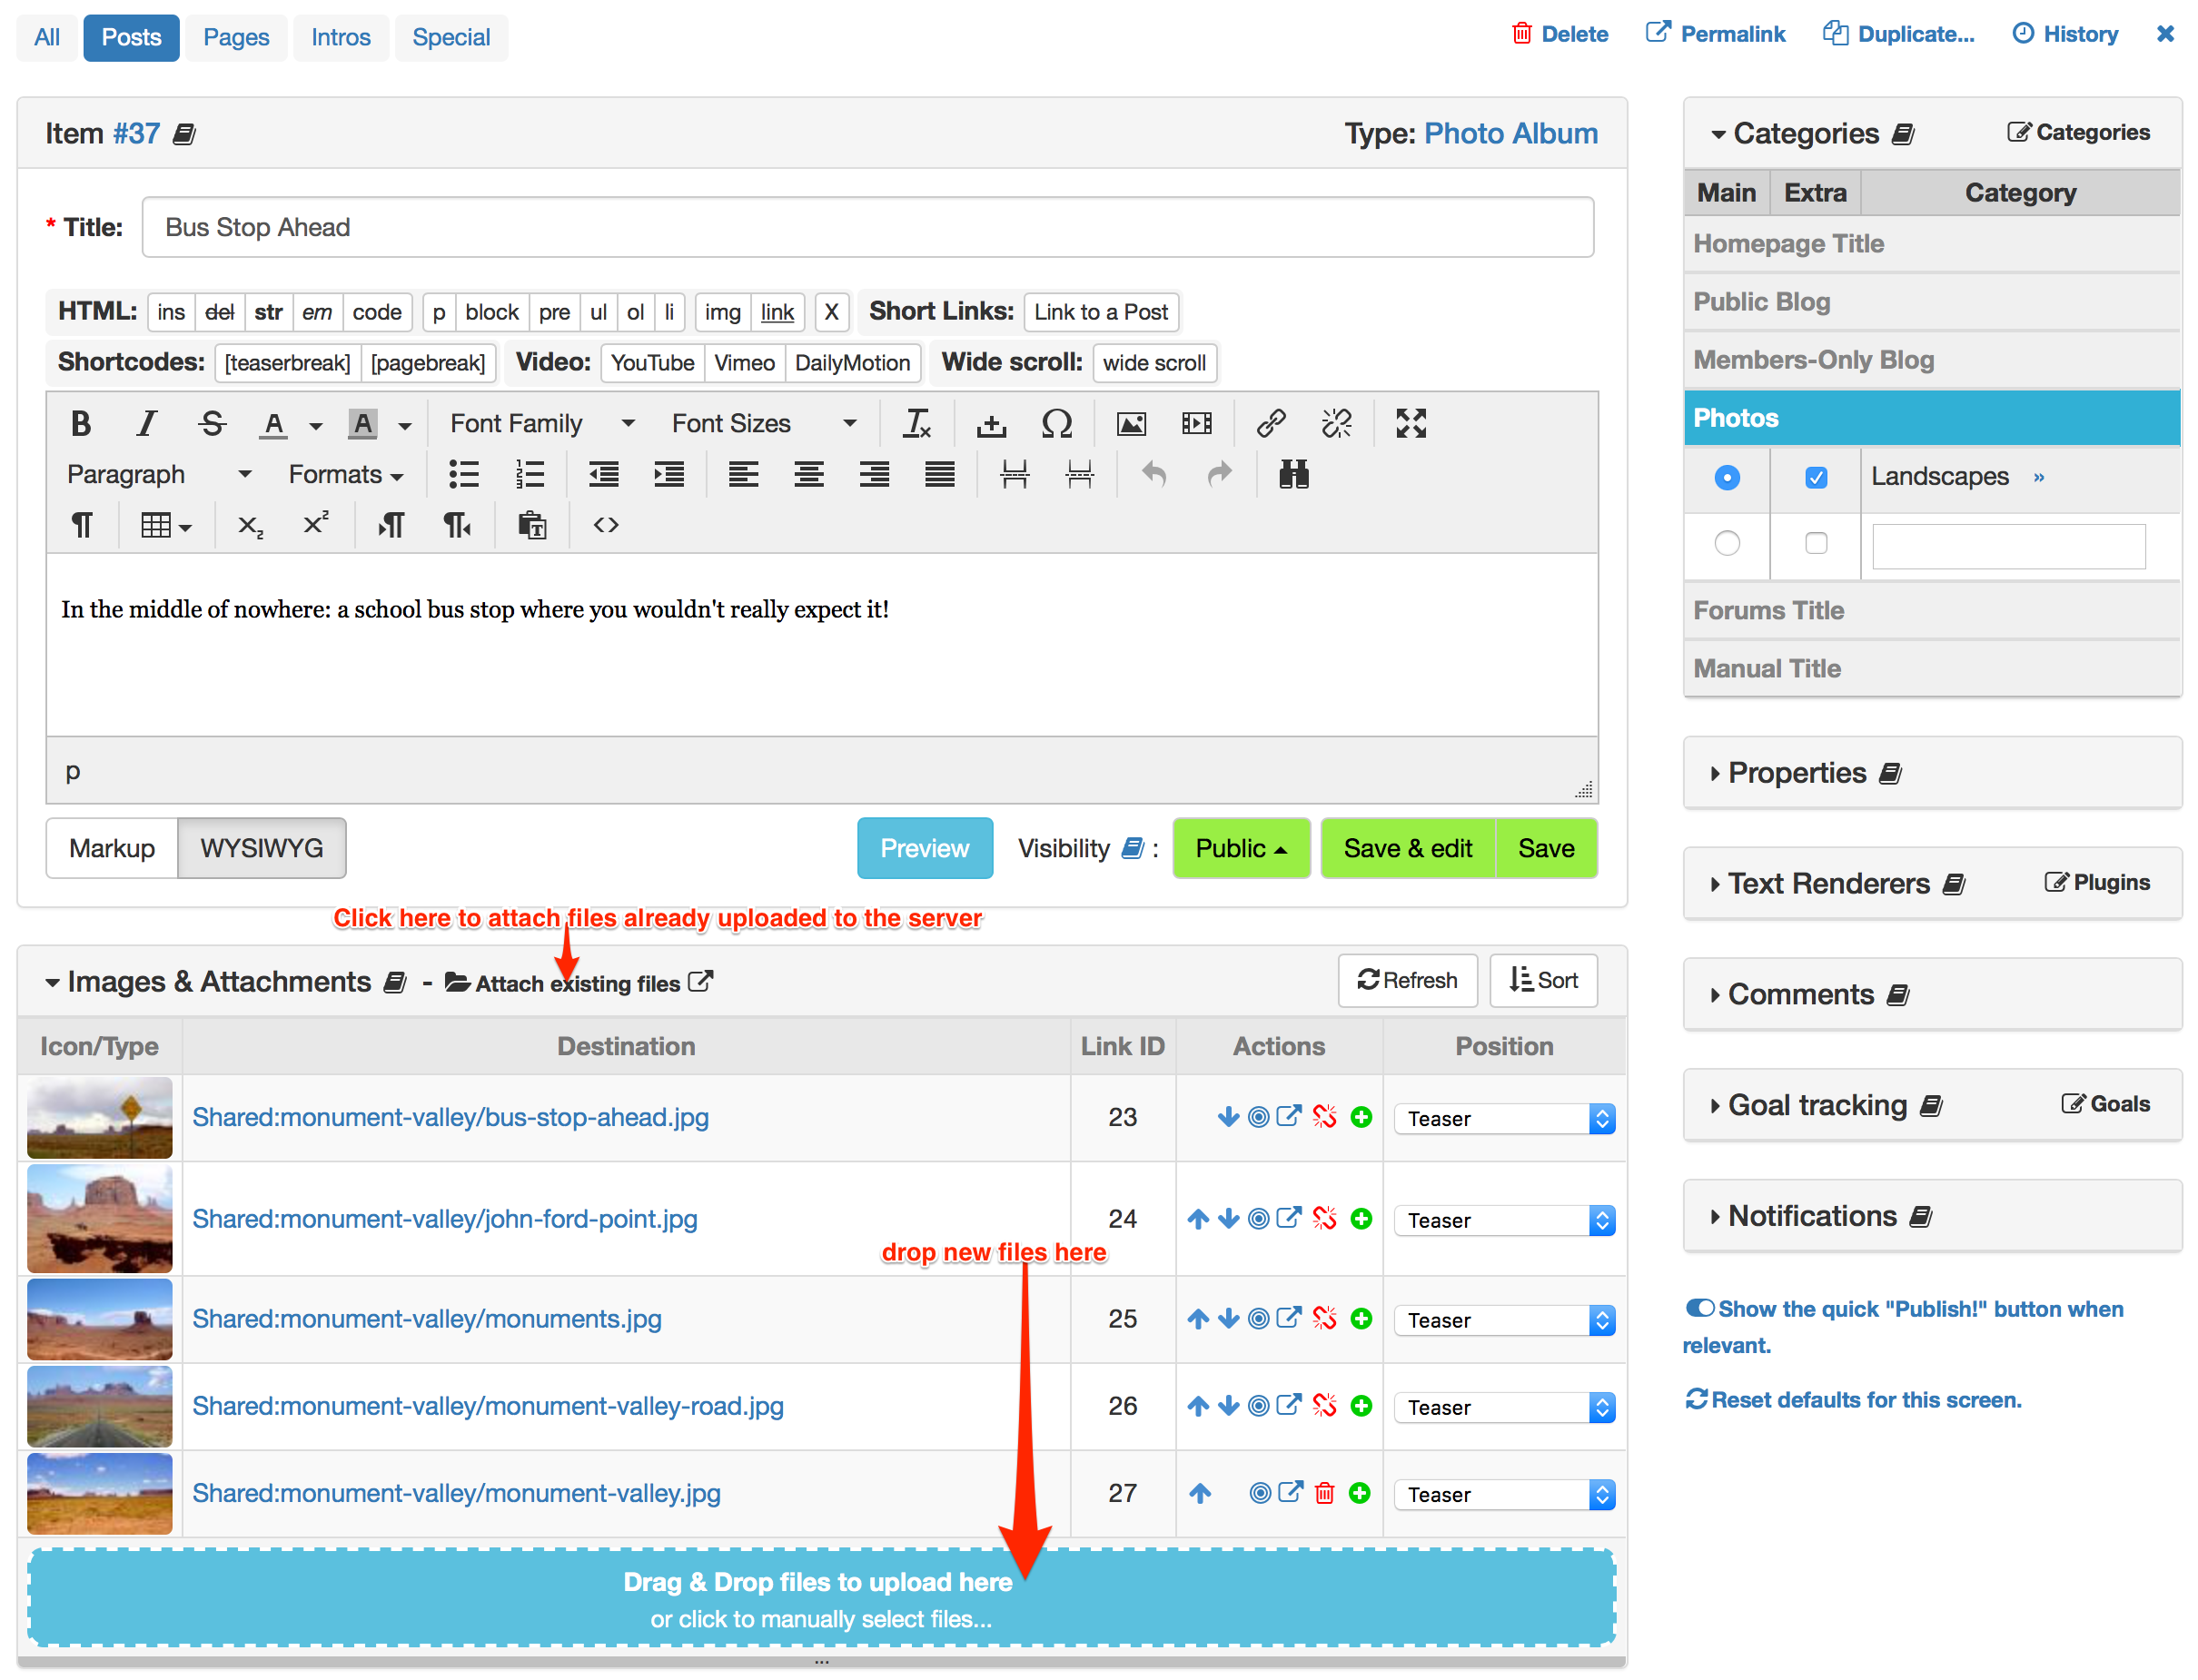
- Drag & Drop files directly into the "Images & Attachments" area of a Post, Comment or Private Message.
- Use b2evolution’s built-in File manager to upload (and later link the file to a Post, Comment or Private Message)
- Upload images through FTP, preferably into a subfolder of the
/media/folder (and later link the file to a Post, Comment or Private Message)
Dragging & Dropping a new file
If you have a new image or video file on your computer and you’d like to add it to a post, the quickest way is to directly drag it and drop it into the area shown below:
Linking a file that has been previously uploaded
If you have previously uploaded a file to your server and would like to use it (again) in a new post, click on the "Attach existing files" link. A popup window will open showing you the File Manager like this:
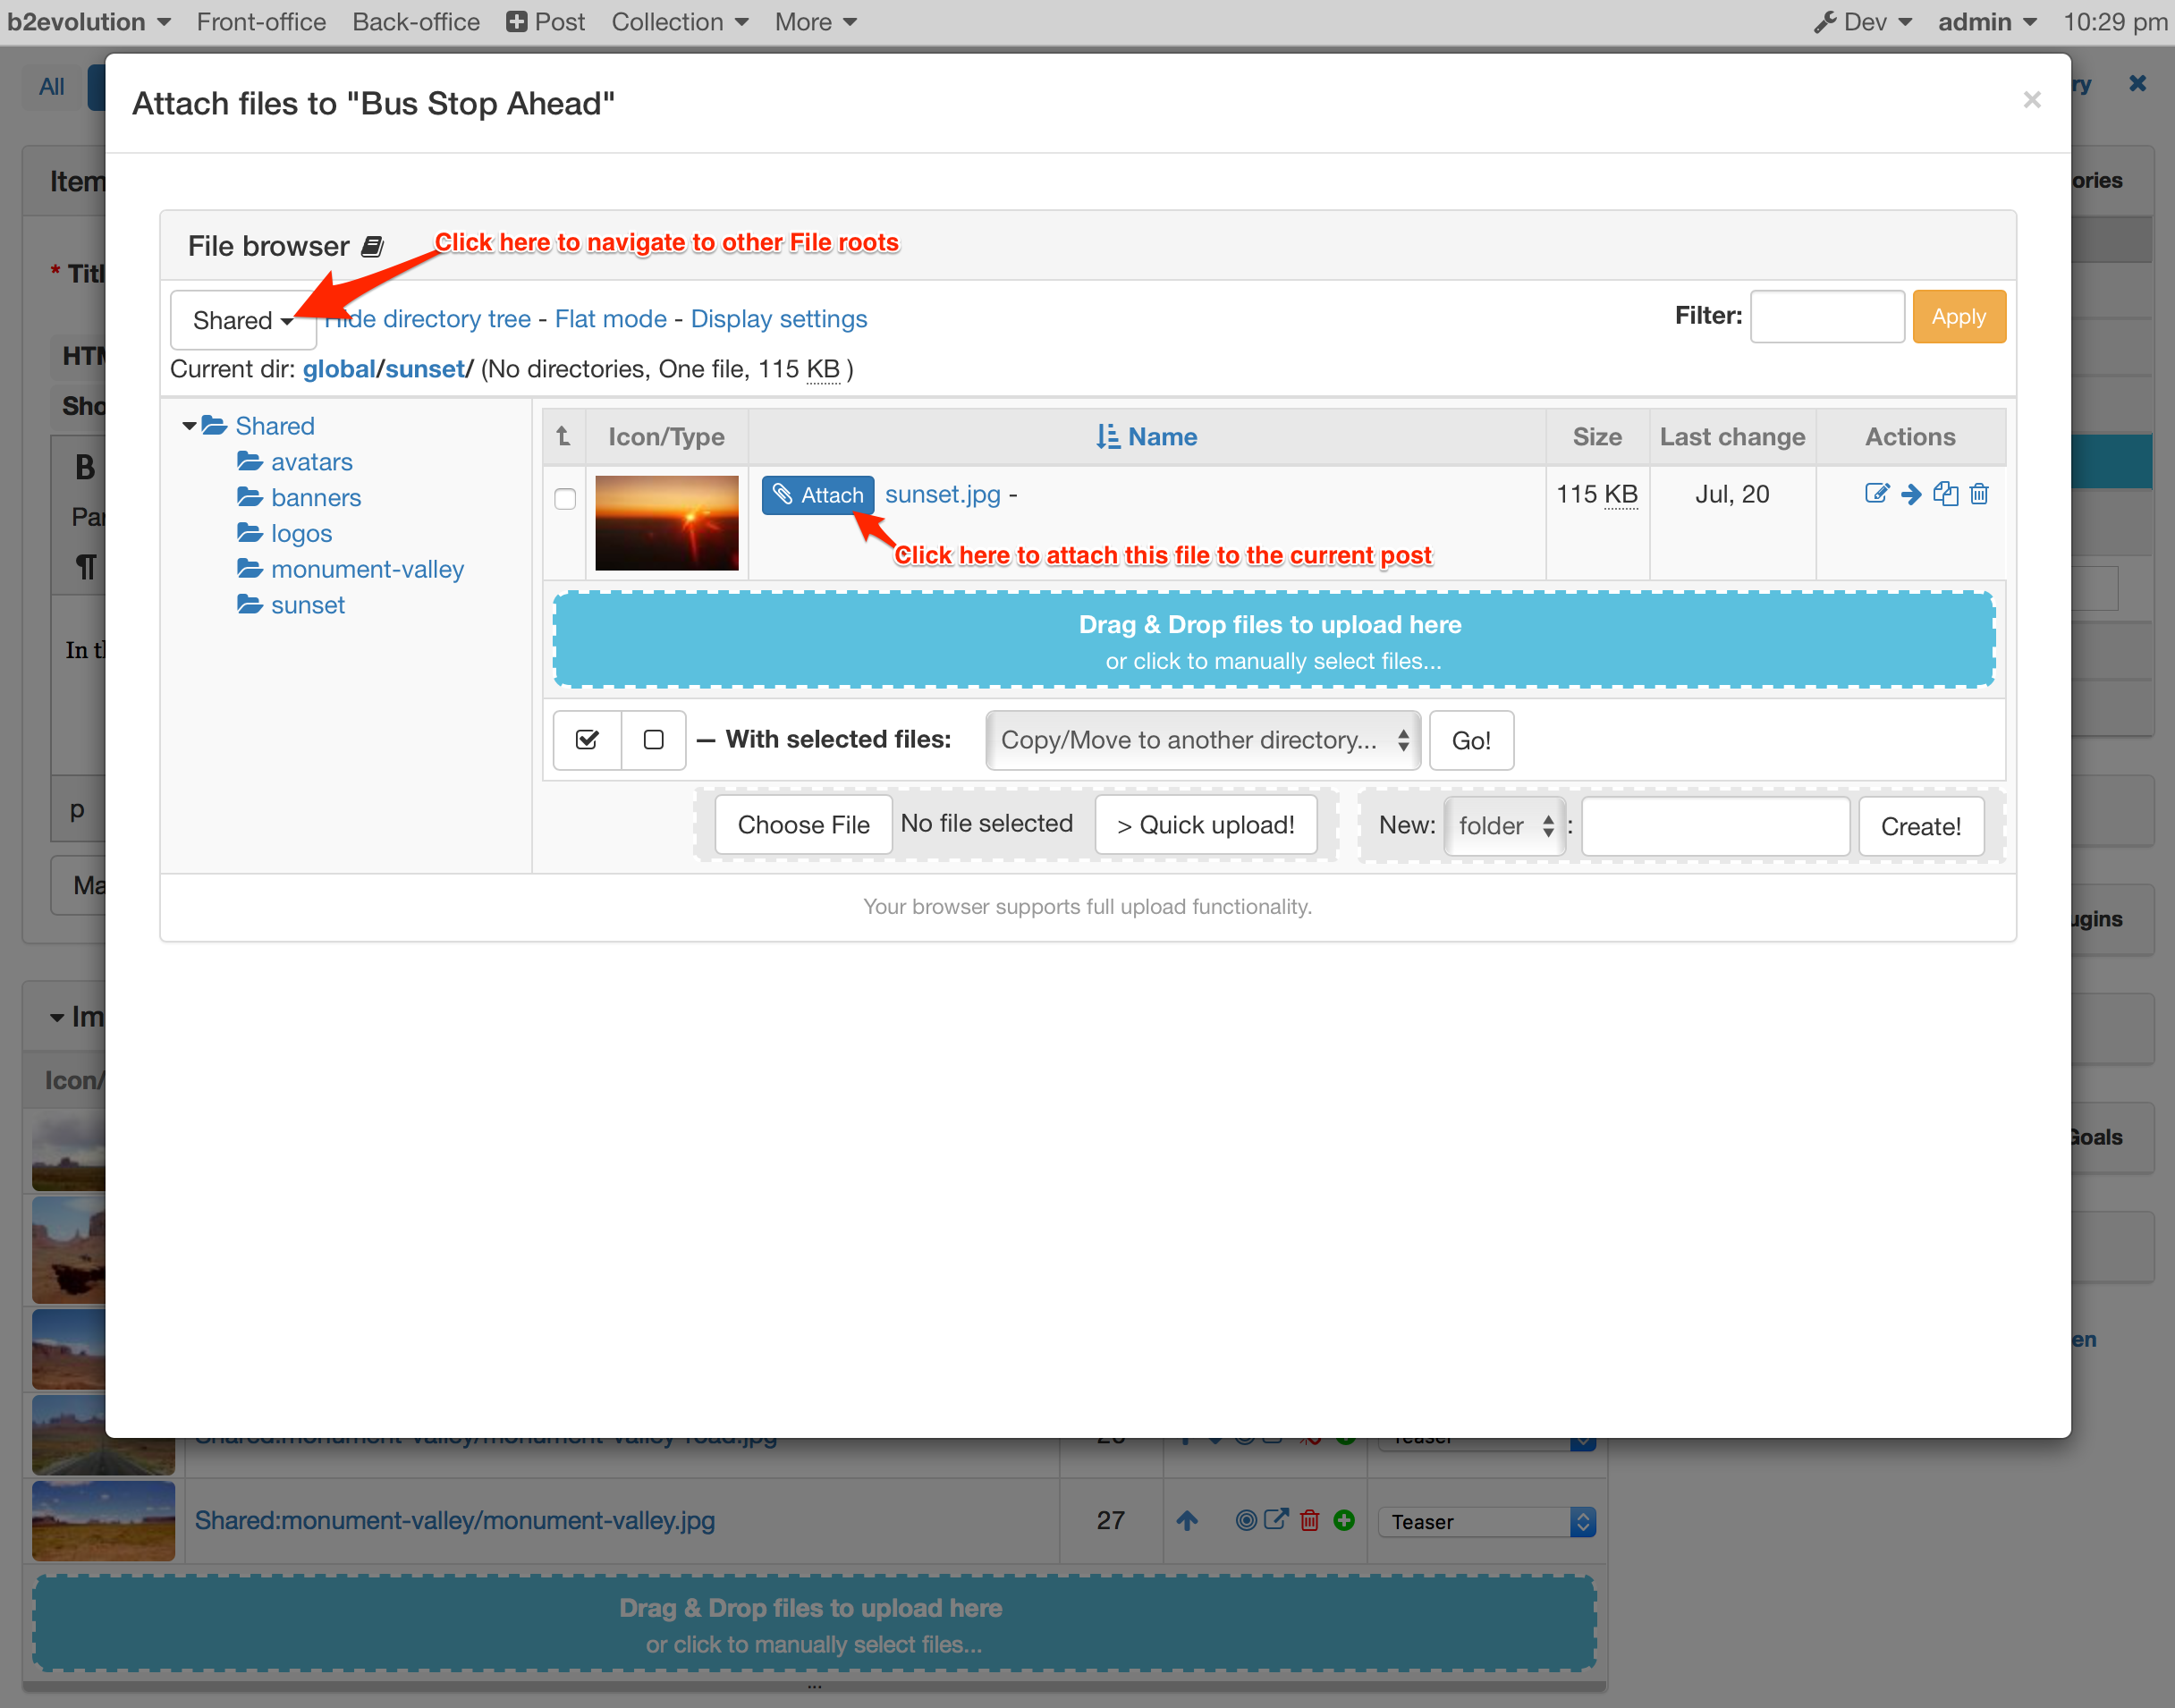
Navigate through the file structure to find the file you need. Then click the "Attach" button to attach that file to the current Post, Content or Private Message. Close the popup window when you have attached all the files files you need.
Note: you can also drag & drop additional files in this window in order to upload them into a specific location.
Note: the file manager also offers options to insert an <img> tag into your post. However we do not recommend this option as it does not allow for automatic responsive/optimized images.
Using FTP
In some cases, if you need to upload many and/or large files, it may be faster to use an FTP tool for the upload.
All the locations / File Roots of the File Manager are subdirectories of the /media/ directory on the server. If you browse the /media/ directory with your FTP client, you will recognize the file roots and you will be able to upload files into the desired locations.
TIP: make sure to verify the UNIX File Permissions after any FTP upload; they may be incorrect and not allow b2evolution/PHP/the webserver to access the files.
Once you have uploaded the files via FTP, use the technique explained in the section above to link them to the appropriate post.
Positioning Images in a Post
Once an image (or other file) has been attached to a post, it can be positioned in several different places.
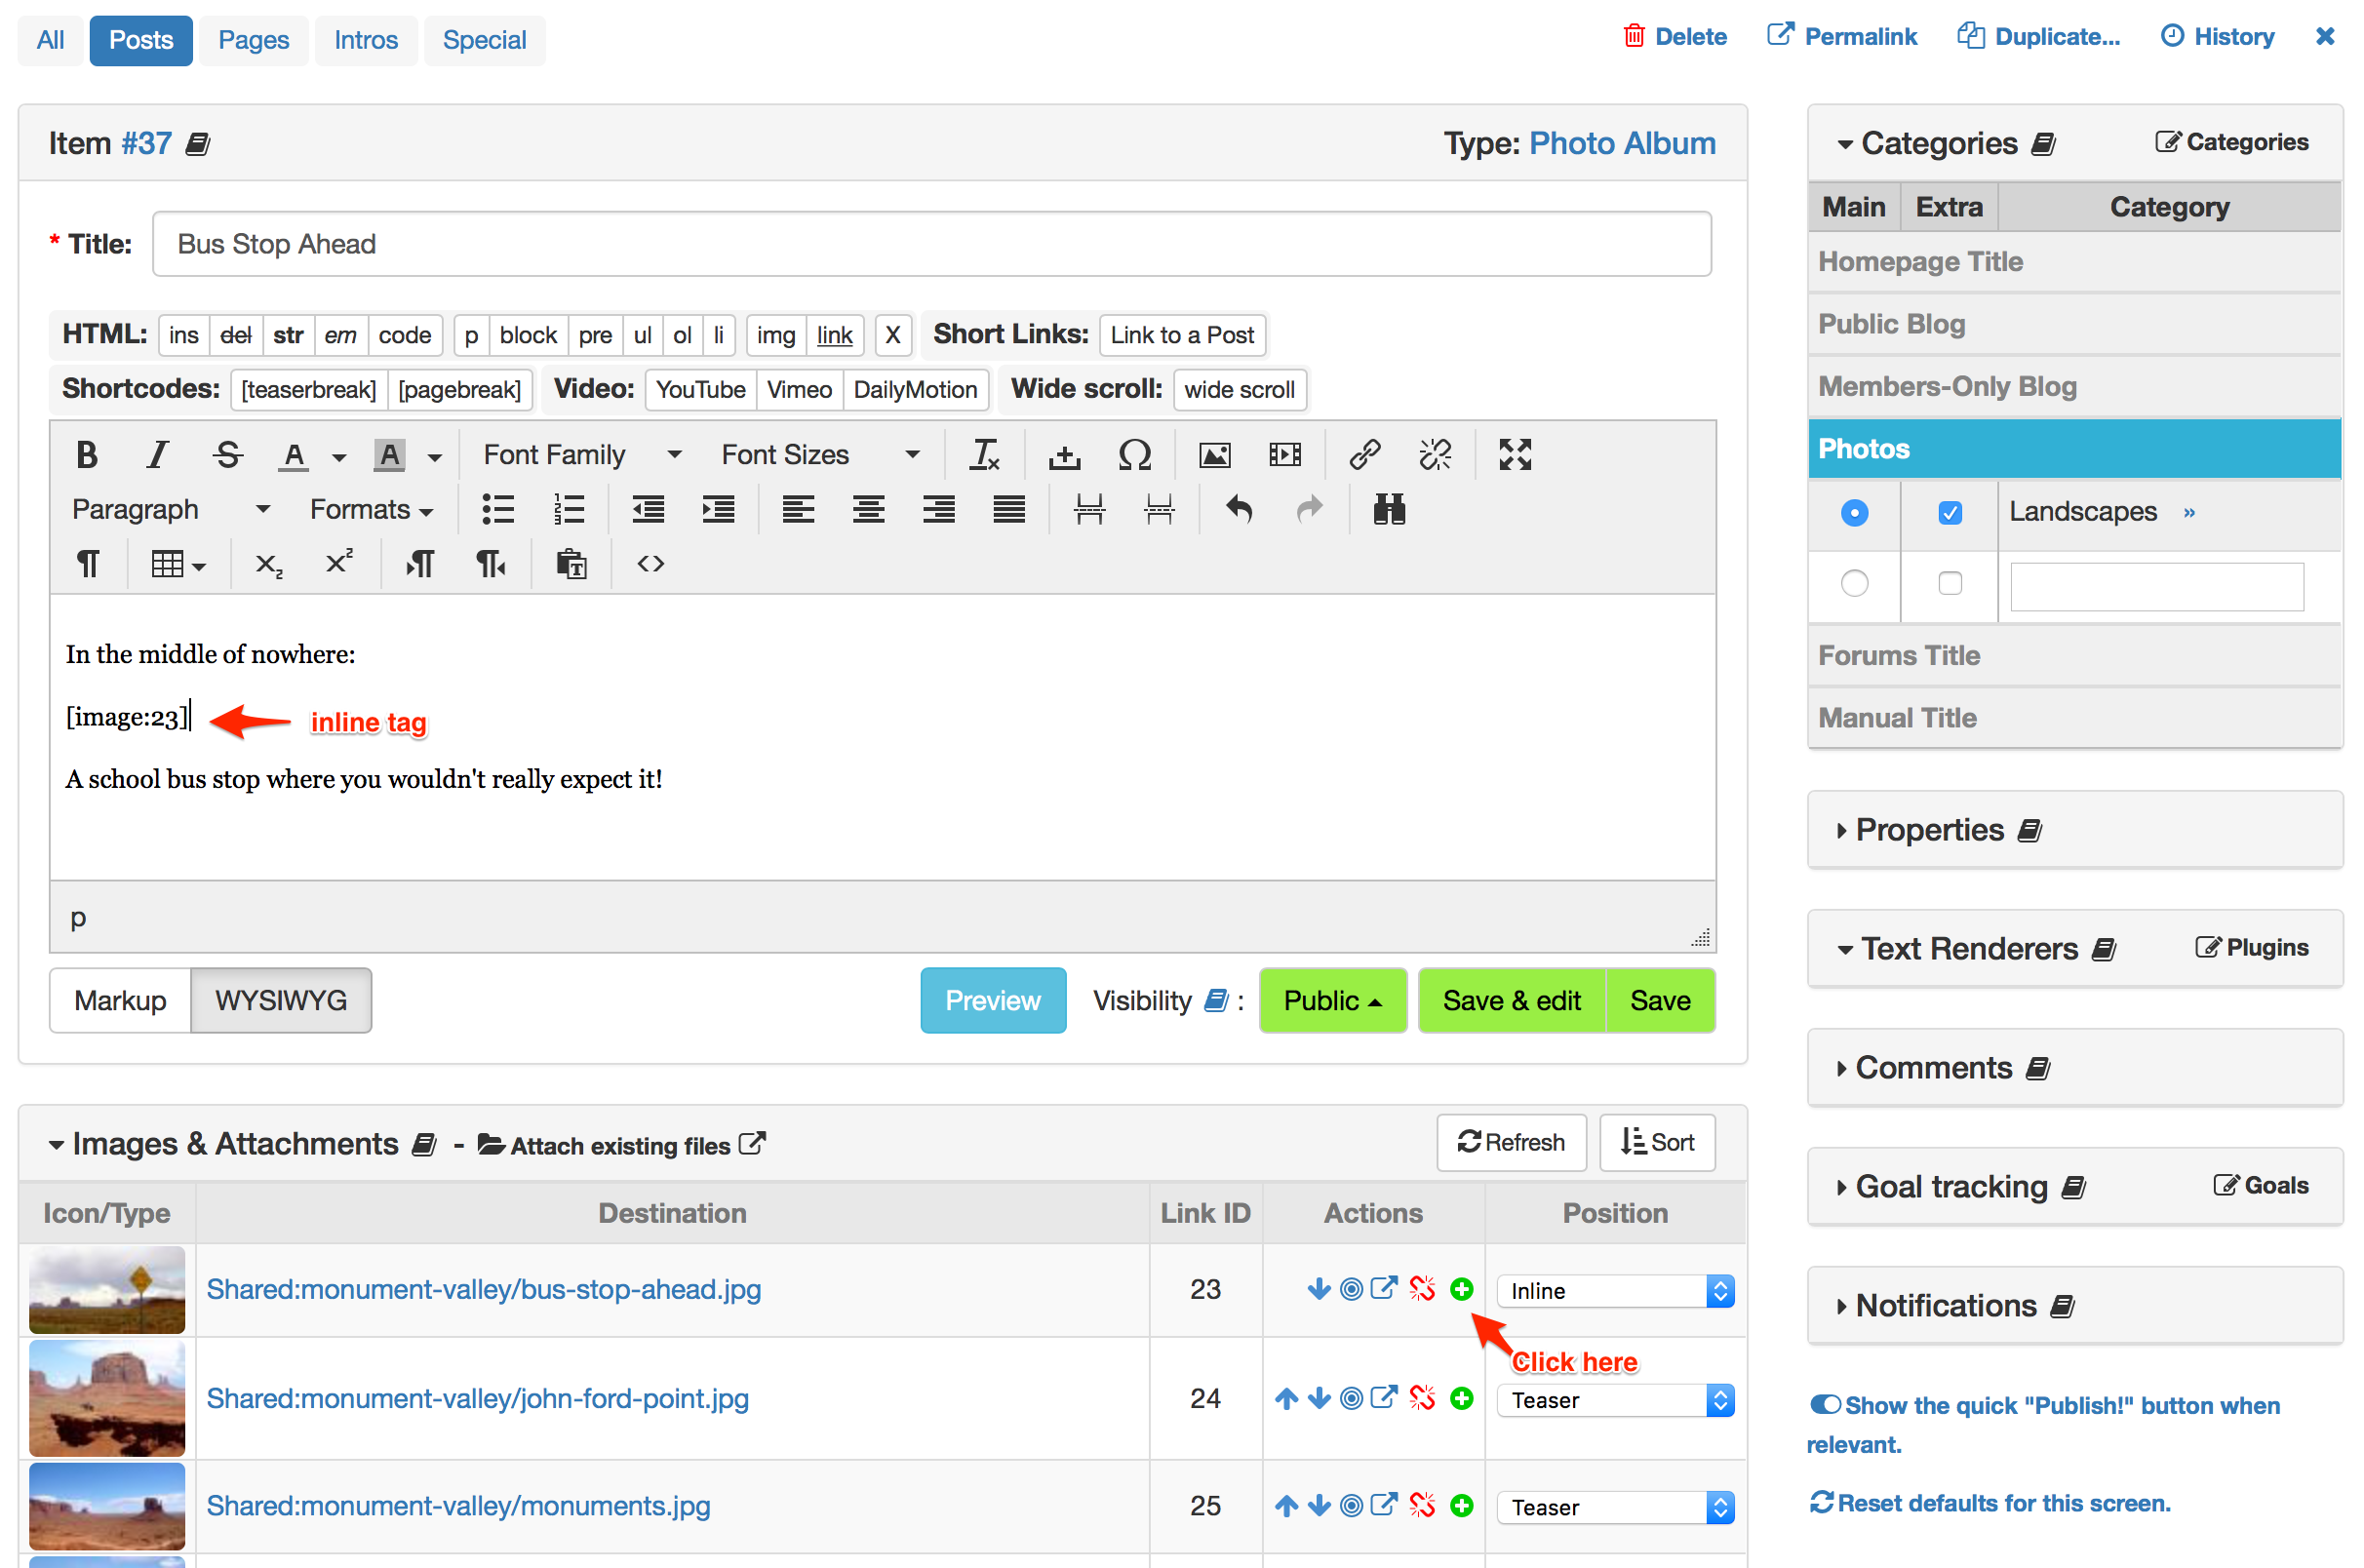
For each file attached to a post you can see a select-list that allows to select a position for the image. The possible positions are:
- Teaser: This option positions the image at the beginning of the post (Teaser position).
- After "more": This option positions the image at the bottom of the post (After more position).
- Inline: This option allows you to place the image in a specific position, anywhere in your post ([image:] Short Tag, [inline:] Short Tag, [video:] Short Tag, [file:] Short Tag…)
- Cover: This option allows you to choose a cover for your post. This will be used in post lists for example. Some skins may also use it as a background image. (Cover position)
- Fallback: This option allows to specify a fallback image to display when a video (of the same file name) cannot be displayed in a specific context.
Using the "inline" position
In order to use Inline images in your posts, put the cursor in the desired place inside the text editor and click the (+) icon next to the attached file you want to insert. A short tag (depending on the file type you add) will be inserted into your post:
Click the "Preview" button to see the result.
Note: All the images in this page have been added using the "inline images" technique, and more details about it may be found in this page: [image:] Short Tag.
Using <img> tags to link images to a post
This is not a recommended method for linking images to a post because it does not allow for automatic resizing of the image, zooming of the images or for reorganizing / moving image files. More information can be found in this page: How to Include External Photos or Images.
Removing Images from Posts
If you decide that you do not want an image linked to your post anymore, locate the picture file under "Images & Attachments" then click on the "Delete this Link!" button (See Arrow 12). The file will no longer be attached to your blog post, but it will still remain in the file directory on the server.