- b2evolution CMS User Manual
- User's Guide
- How To...
- How to Display content as Tabs on a page
How to Display content as Tabs on a page
Goal
Display several Posts/Items as Tabs that can be switched instantly (if Javascript is enabled) like this:
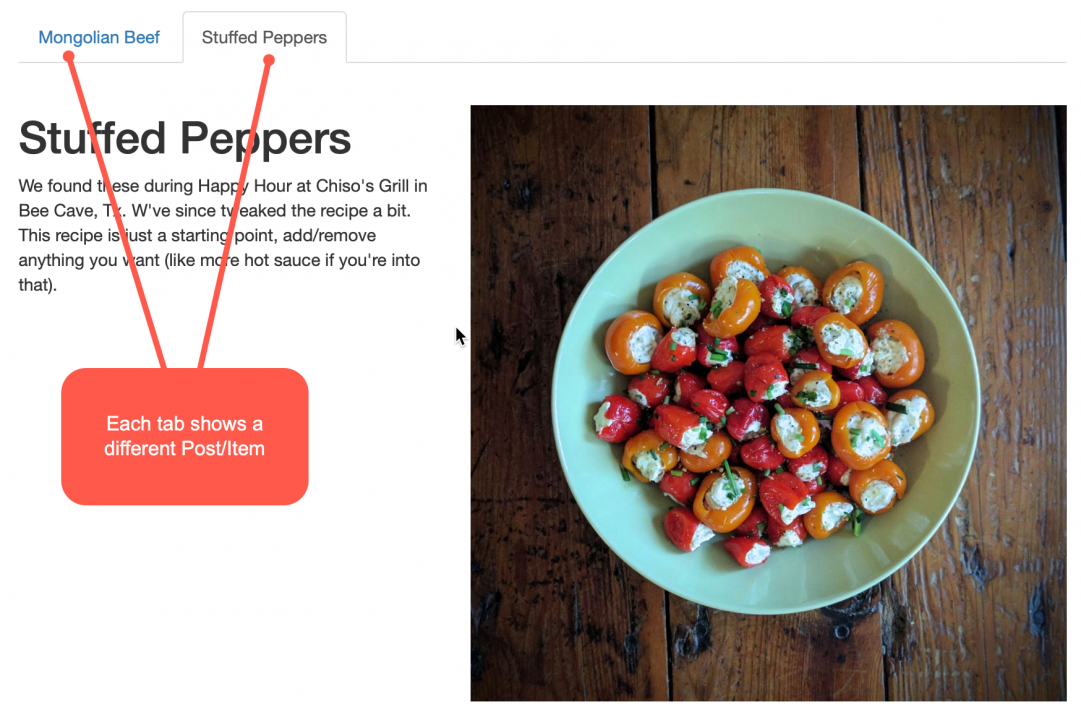
Particularities:
- All content is loaded at once but only one tab is visible at a time
- If Javascript is enables, the switching requires no HTTP request (but the URL is still updated)
- If Javascript is disabled; the switching will reload the page
- The active tab is specified in the URL through a param like
?tab=slug-of-active-item
How to create such a Tabbed zone from scratch
The Tabbed Items Widget can be inserted in any Widget Container but for perfect & seamless handling of switching params, you should use a Widget Page. This is what we will do here…
1. Create a Widget Container in a Widget Page
If you don’t have a Widget Page with a Page Container yet, the quickest way to create one is this:
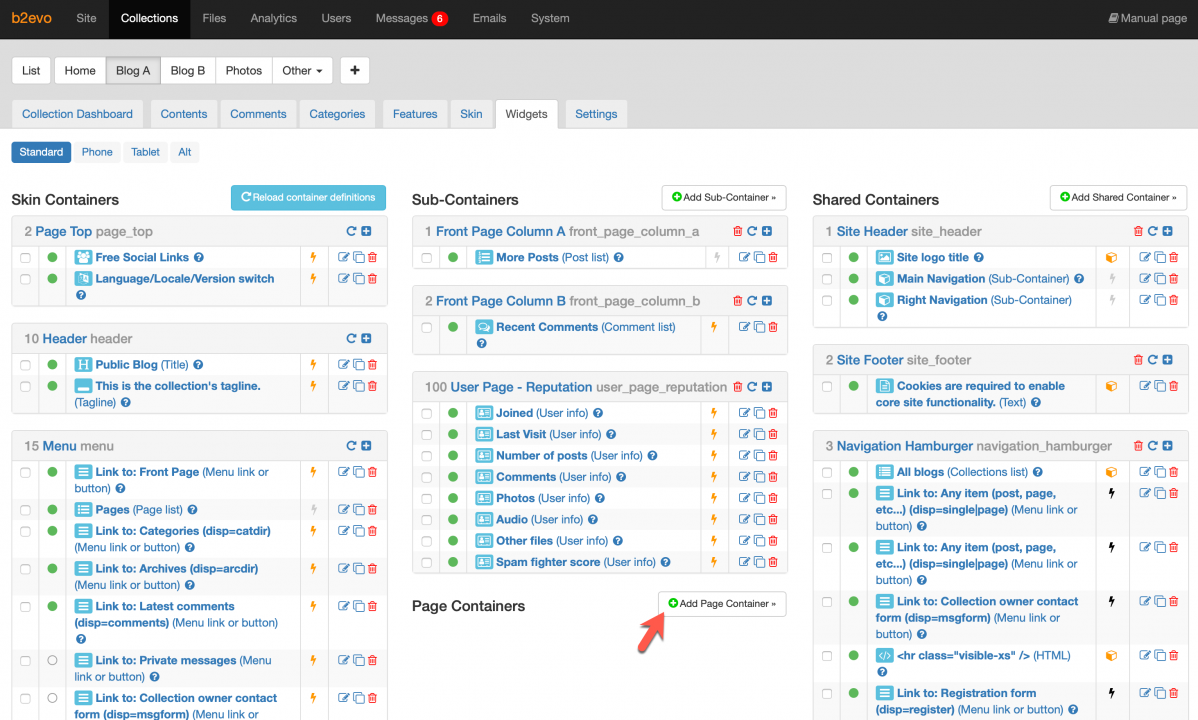
Make sur to create the new container for a new Widget Page :
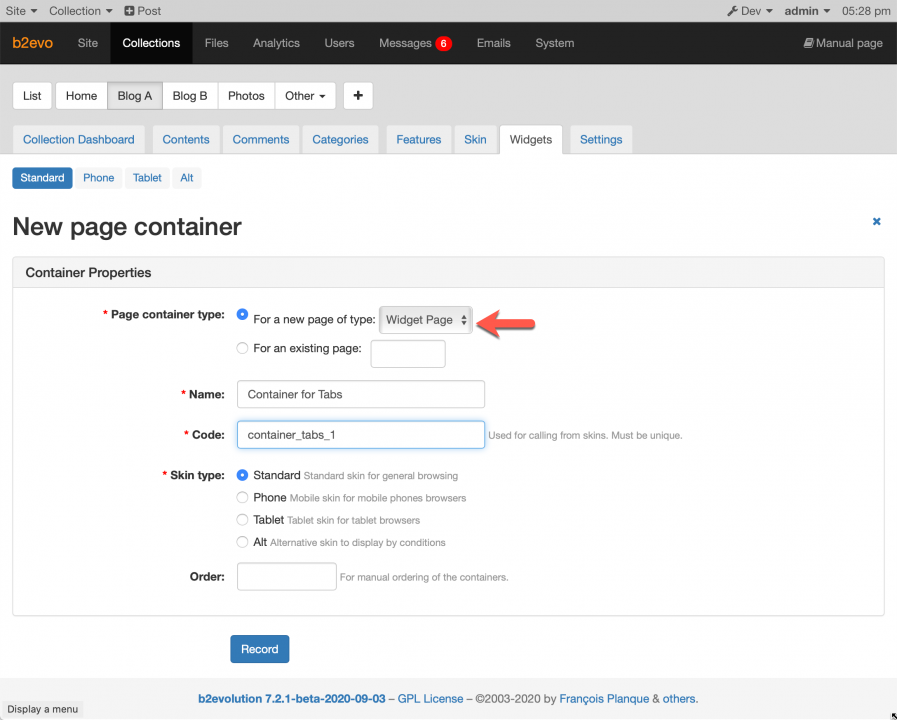
This will create a new Widget Page and also a new Page Container inside that Widget Page.
2. Edit the Widget Page
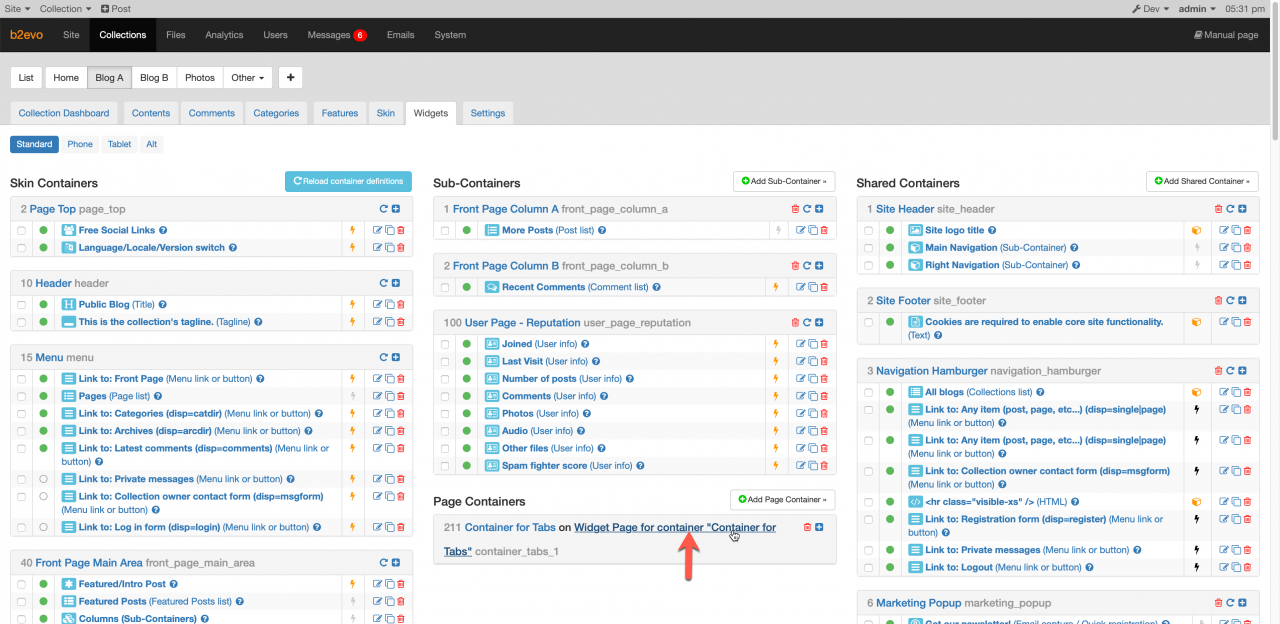
Now, go edit the Widget Page by clicking here:
Then edit the following info:
- The title you want for the page
- The slug you want for the page
- IMPORTANT: The param name you want to use in the URL for switching tabs. By default you can use
tab.- Note: If you are going to use multiple Tabbed Items Widgets on the same page, you can enter multiple params like
toptab,middletab,bottomtab
- Note: If you are going to use multiple Tabbed Items Widgets on the same page, you can enter multiple params like
- Publish the page…
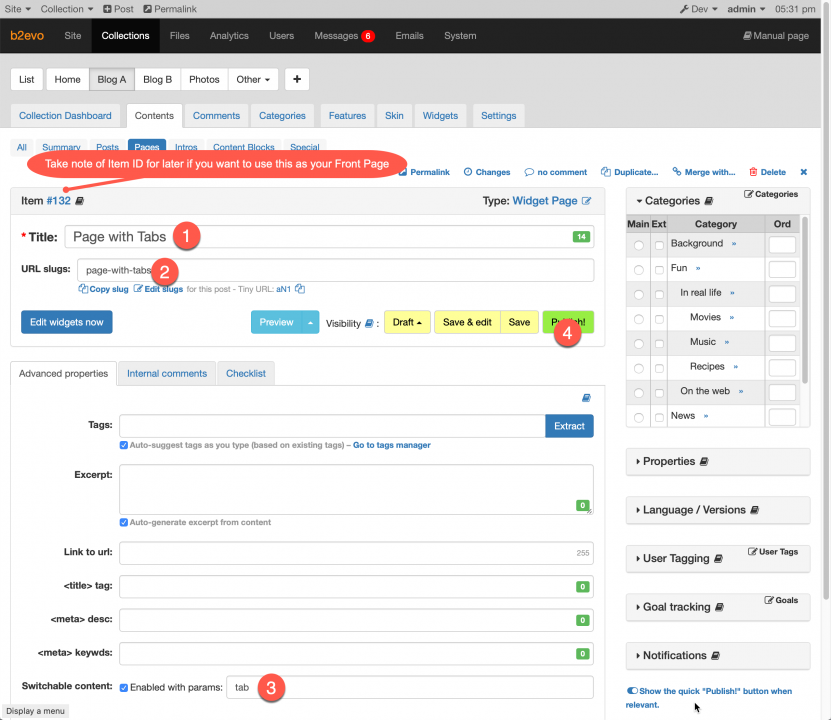
If you later want to set this page as Front Page instead of a normal page, make a note of the Page ID / Item ID.
3. Add a "Tabbed Items" widget
Once you have published the page, you can use the Front Office Customizer mode to easily add a widget:
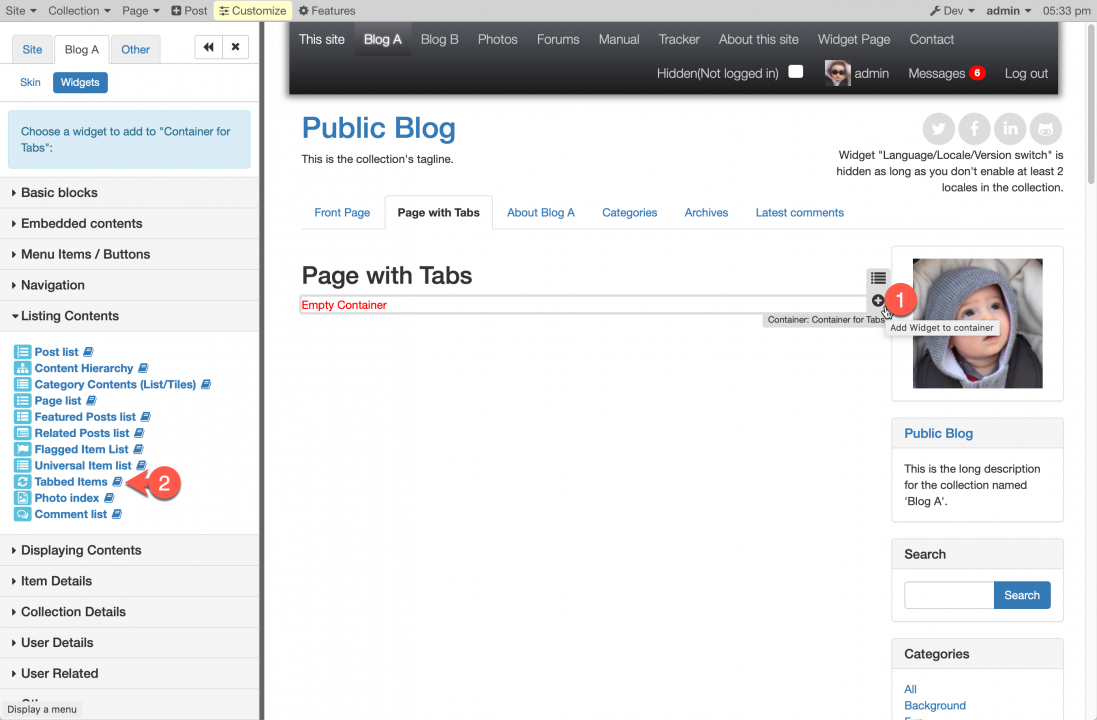
Various widgets allow you to list your content Posts/Items in various ways. The one we’re interested here is the Tabbed Items Widget.
4. Configure the widget
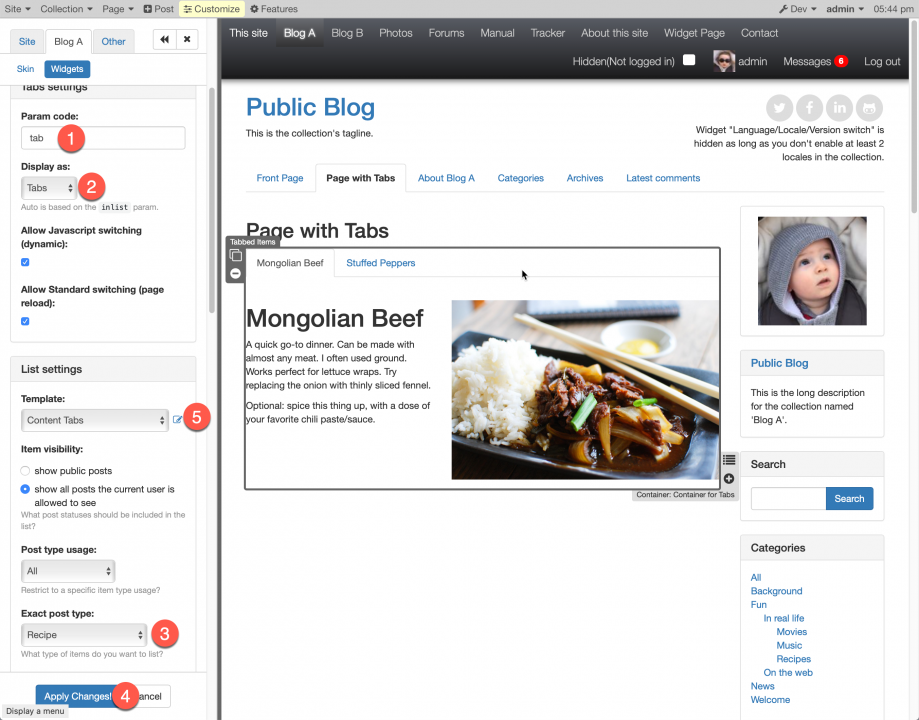
The key parameters to change here are:
- The param name to use in URLs to designate the active tab, for example
tabwhich will result in?tab=item-slug.- This must match a param name you have specified in the Widget Page in Step 2 (mark 3);
- If you have multiple switchers on the same page, make sure to use different param names for each.
- The format for your tabs, in this case "Tabs"
- You probably want some sort of filtering or you will have 1 tab for every single one of your Items. In this example we filter on Post Type.
- When you apply the changes you will see the result of your settings (exit Customizer mode to test the switching)
- Note that you can go edit the templates in order to control how the tabs are formatted.
5. Optional: Set the page as front page
If you want to use that widget page as your front-page, you can set it here:
