- b2evolution CMS User Manual
- Back-office Reference
- Emails
- Campaigns
- Creating an Email Campaign
Creating an Email Campaign
Step 1 - Creating a New Campaign
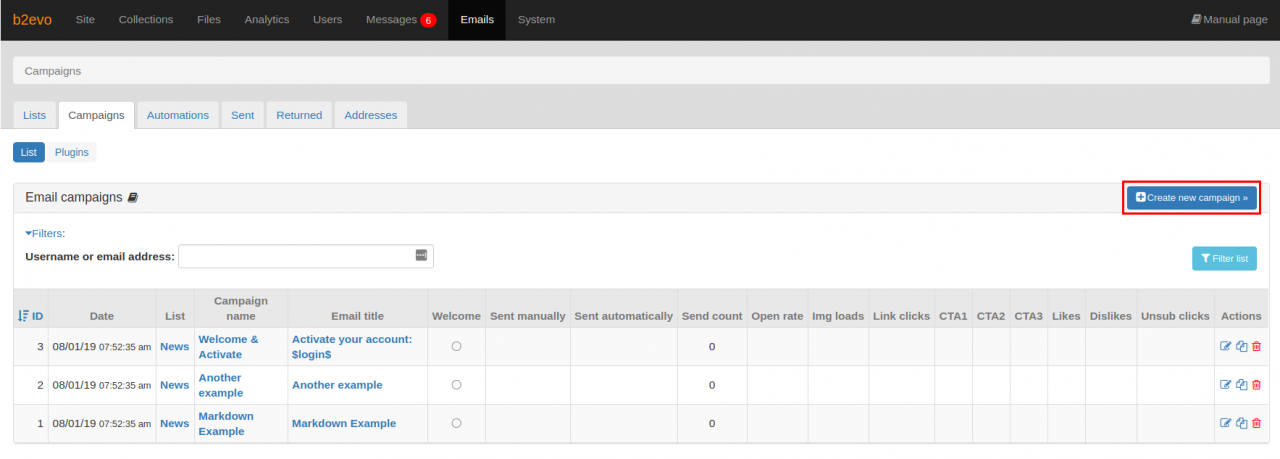
- Go to b2evo > Emails > Campaigns
- Click on Create new campaign button
All the previously created email campaigns are displayed in the email campaigns list table.
Step 2 - Naming the Campaign
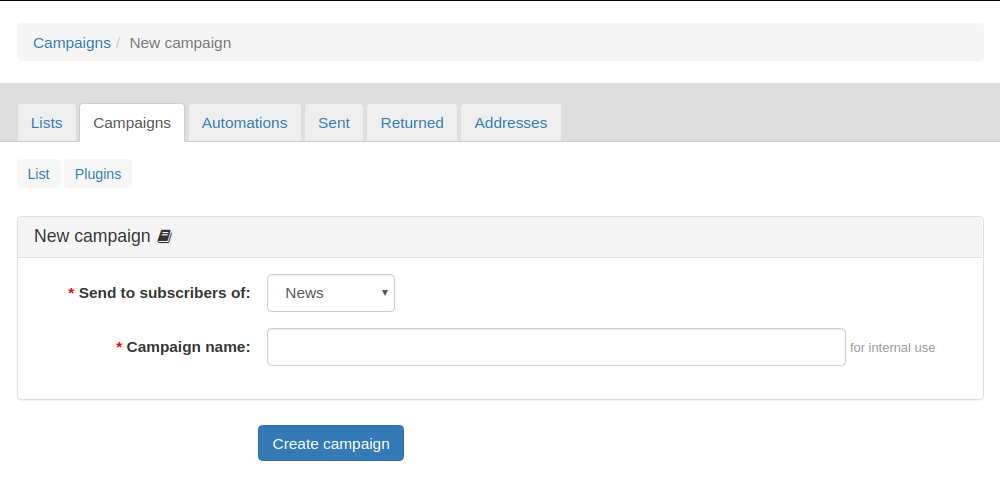
- Select an Email List to associate with the email campaign. The subscribers of the selected email list will be the initial set of recipients. Do not worry, you will still be able to change or customize the recipients later on.
- Set a name for the campaign. This name will help you to identify this particular campaign in the future.
- Click on the Create campaign button, this will save the campaign and show you a form to further customize it.
Step 3 - Editing the Campaign
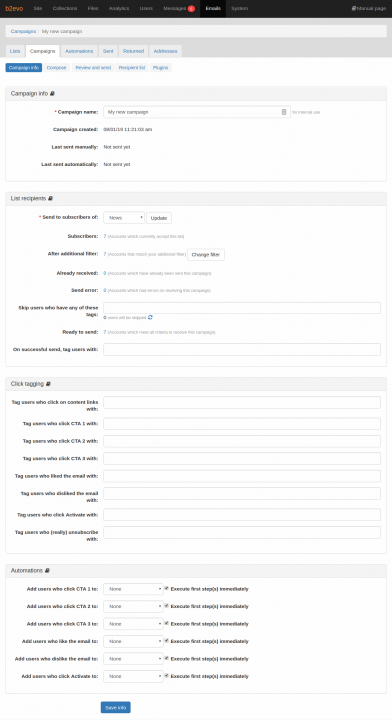
- You can change the name of the campaign in the Campaign Info panel.
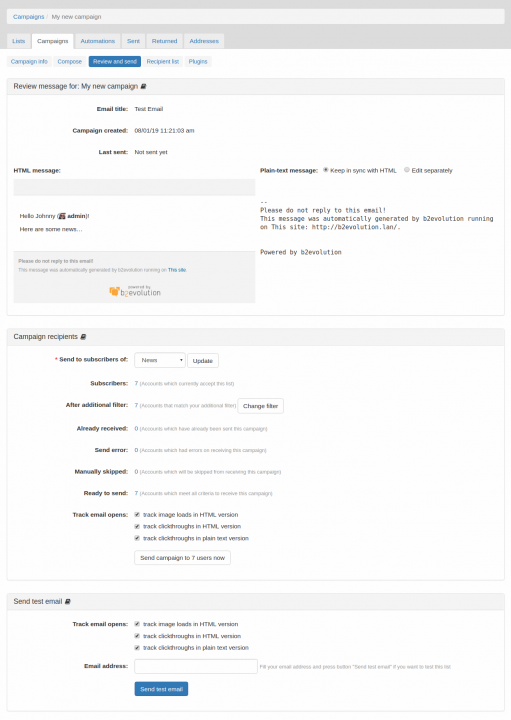
- The List recipients panel allows you to change the associated Email List or further filter the list of recipients of email campaign. This panel also shows the number of recipients.
- If your email campaign contains special links (CTA, Like, Dislike, Activate) provided by the Email Elements Renderer Plugin, you can assign user tags to recipients who will click on those links in the Click tagging panel.
- Similarly, you can automatically add recipients who clicked on the special links to specific Automations via Automations panel.
- Click on the Save info button to save the changes you have made. This will lead you next to the composer screen.
Step 4 - Composing the Content
You will compose the content of the email campaign in this screen:
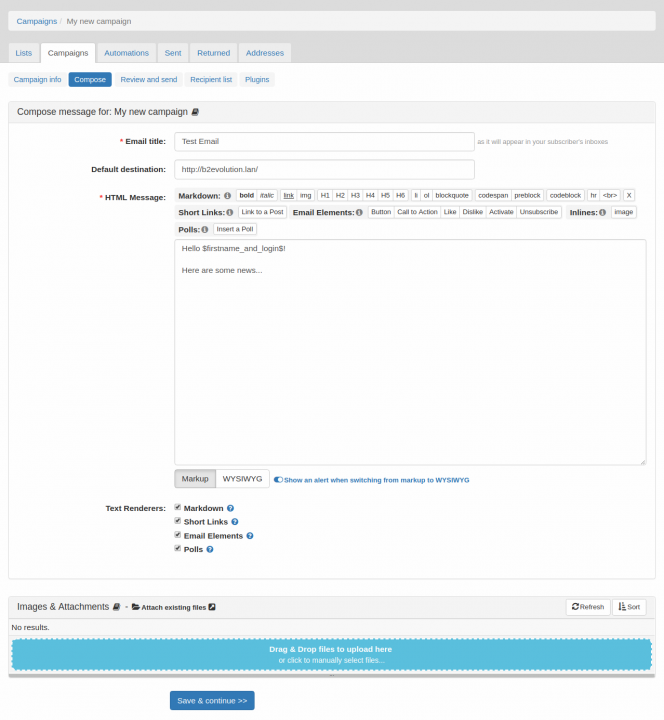
- Specify the subject or title of the email.
- Specify the URL of the default destination for certain links that redirect.
- Compose the body of the email. Please note that this step is for HTML messages so you can use the appropriate markup to format your content.
- You can use the special links provided by the Email Elements Renderer Plugin if you need to track certain actions made by a recipient.
- Once you are satisfied with the content click on the Save & continue button to save the contents of the campaign and proceed to the next screen.
Step 5 - Reviewing the Campaign
The Review and Send tab allows you to review the content of your email campaign. A preview of the content is displayed for both HTML and plain-text version. You can filter the recipients for the email campaign in the Campaign recipients panel.
Customized Plain-Text Version
Note that some users set their email preferences to receive messages as plain text. Also, their email clients may not accept HTML emails, so this kind of messages will fallback and be displayed as plain text too.
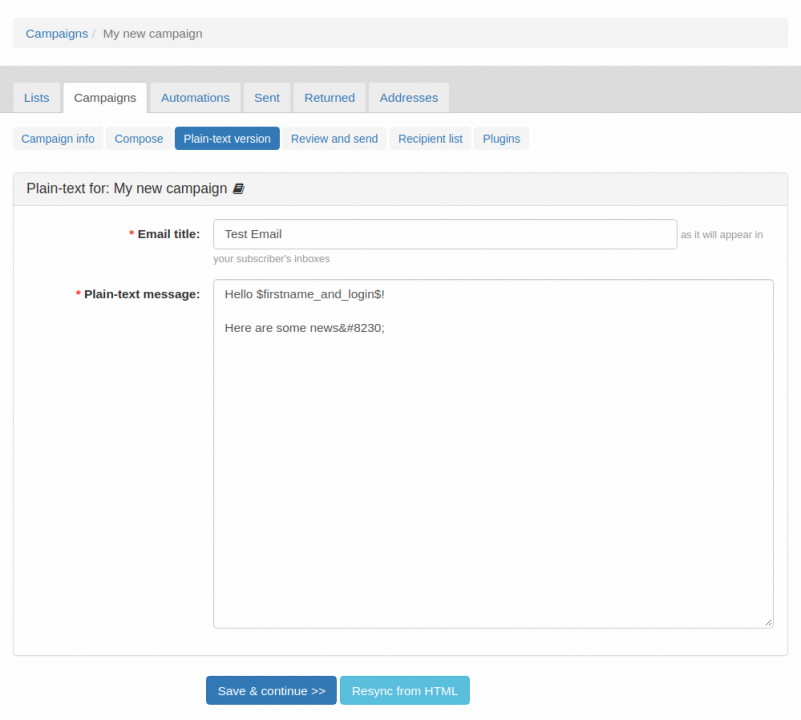
If you are not satisfied with the automatically generated plain-text version of the campaign or you would like to customize it by hand, you can edit the plain-text version separately:
- For the Plain-text message field, located above the plain-text preview panel, select
Edit separatelyoption. - Click on the Edit button, this will lead you to a form where you can edit the plain-text version of the campaign.
- If you would like to extract the plain-text version from the HTML version again, click on the Resync from HTML button.
- If you are done with editing the plain-text version, click on the Save & continue button which will save the plain-text version and will lead you back to Review and Send tab.
Send Test Email
If you would like to send a test email to check if everything is correct before sending the campaign to the recipients, you can do so using the Send test email panel:
- Specify the email address where the test email will be sent.
- Click on the Send test email button.
Send Email Campaign
If you are ready to send the email campaign, click on the Send campaign to N users now button. This will send your email campaign in chunks immediately or via scheduled task depending on the settings found in the Email Campaign Throttling panel.

